
We are starting work on a bunch of molding and casting this year. We are holding a workshop in August for 15 lucky people who will create a mold of a skull and cast it in rigid foam.
I put 1 coat of rubber on the skull so far. I'm waiting for the pigment to come in so I can color each layer.
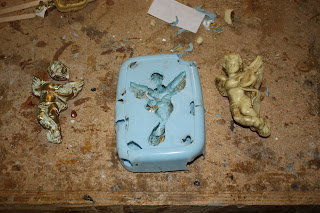
 But first I have a couple of other projects I wanted to to do. The first was a couple of new accents molds for tombstone workshops this summer. Chris brought home a couple of cherubs she wanted me to make molds of so I went to TAP plastics and bought some rubber and made the molds. I broke both of the originals getting them out of the mold but the foam casts came out great. I also used a good portion of the rubber for another project which left me a bit short so I created voids in the rubber with some clay on the square one.
The other project is 48 resin votive candle holders for Chris' luminary. We need to have holes in the bottom for the LED's and wires and drilling glass just isn't smart. So I suggested we create a mold of the original glass holder and then cast them in clear resin tinted red. I'm on my third one and they are turning out pretty good. The resin takes longer to set than I would like (about 36hrs) but that might have something to do with the shop feeling like a walk in cooler. The one on the paper plate is the copy and the one on the table is the original.


3 comments:
wow! really cool! I gotta try this!
This will be really great for drainage and keeping it from shorting out during the rainy season. I couldn't tell the difference between the original and the clone until I read the captions. Great Job :-)
I keep meaning to learn mould making and casting. This is just one more post that inspires me to do so.
Post a Comment